Posts

Showing posts from April, 2019

Shavasana yoga

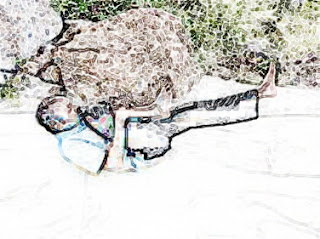
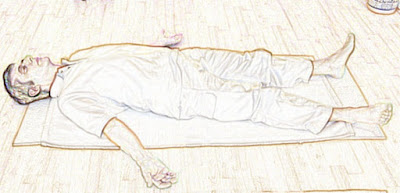
Shavasana The Yoga practitioner only knows that the most difficult and unaccountable seats in Yogas are Shavasana. And interestingly, it is not understood why this housework is easy to think of as a very easy situation for many. Shavasana According to Yogis, according to the practice, one should take a break from the 20 to 30 years of seva at every stage of the practice. After a few consecutive sessions of the Ijaya, some important sessions of Yoga have been rested for the rest of the day after the practice of Shibasan. In this way, after a yoga practice, there is no harm to the body if you take a break from sleeping between 30 to 45 seconds. Rather, according to the nature of any other seat, the practice of Shabansan is very important as the process of bringing back differentiation or transfusion of blood to blood transfusion or excessive blood transfusion of the body, in the process of bringing it back to a better normal state of the past. The body of the dead is de
Pavan-Muktasan yoga

Pavan-Muktasan The name of this seat is named after Pavan Muktasan Pavan-Muktasan Method: Read the rest and sit down. Hold the right leg and knock the knee and hold it with two hands and hold it with the right knee. Keep it in the condition of 20s to 30s. Then fold the hand loose and restore the right leg. Take the left leg and bring it on the left chest. And after that turn back the leg. Then bring the two Hamas together and hold on the chest. Make a habit of 3/4 times each. The breathing will be normal. During the first practice, thighs and knees do not take with the stomach and chest, but there is a thin soft pillow between the stomach and the thigh. Because the main purpose is to put pressure on the stomach with the thighs. After the habit, take rest in Shavasana. Advantages: Those who have air in their stomach must take their seat. If you practice this seat, you never get stomach disorders. Apart from this, the seat also eliminates all the diseases of the stomach, co

Padmasana yoga

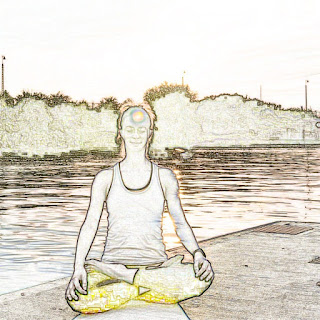
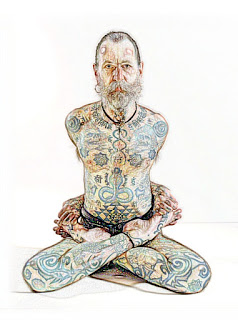
Padmasana: It is called Padmasana because it looks like a bloomy lotus seen in the Yoga practice. As the potato in vegetables makes all the work is done by all the workers, as well as the application of yoga exercises, due to the popularity due to its popularity, many myths can be observed in this mystical Padmaon study. Padmasana is basically three types: free-Padmasana, closed-Padmasana and raised Padma Sadan. Mukta-Padmasana or Siddhasana: Mukta-Padmasana Method: Sit straight on the head and spread the legs. Now break the left leg from the knee and place it on the right thigh and the left foot as well on the left thigh. Put your two hands on the cheetah or chit or put it on both sides of the palm (the siddhasan is also called siddhasana). Or put on the chest in the salute gesture. Now touch the nasal nose and the tip of the tongue to the end of the grip. Stay in that condition as long as possible. There is no harm if there is much time in the Padma. Breathing

Laghu-Vajrasana yoga

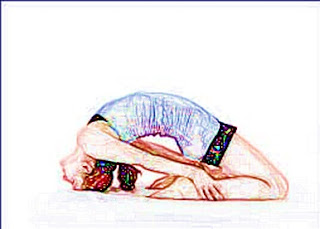
Laghu-Vajrasana Laghu-Vajrasana Method: First, lie down in the latent-thunderstorm. Now put the hand on both sides of the head parallel to the floor while the palate is covered. Now fold the arm from the elbow and place it on the two sides of the head and place it on the top of the upper part of the body and bend the spine and slowly lower the palm of the head. The breathing will be normal. Stay in the 20s to 30s. Then again, on the chest of the body, lift the body upside down and slowly go to the vagina of the sleeping-thighs and then open the fold of the legs and put both hands on both sides of the body. Advantages: All the attributes of latent-vibration are present here. All parts of the body are exercised in this seat. Especially the neck, throat, chest, stomach, abdomen, and spine are very good to work. As well as increasing the flexibility of the spinal cord, the body extracts the extra fat and fat and makes the body very nicely.

Supta-Vajrasana

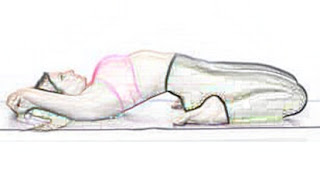
Supta-Vajrasana Supta-Vajrasana Method: Sit in front of the Vajrayana first. Keep legs, knees, and butt in that condition, and then lie down slowly and lie down. If you feel embarrassed, the heel of the heel can take a little while. Hold the right elbows with the left elbow and the left hand on the floor behind your head or on the floor below the head. Now take a little back from the background. The breathing will be normal. Stay in that condition from 20 to 30s. Then slowly lift the feet from the bottom of your waist, make it straight and keep your hands on both sides of the body and take rest in Shavasana. Thus, seat 2/3 times. Advantages: The spinal bone pairs are flexible in these seats. The hands, legs, stomach, back, chest, waist and hip muscles and nerves are fresh and active and the chest is well-formed. There can be no stomach disease easily. If you keep the habit, you can not have arthritis or sciatica, and if you have a good time, it will be good.

Vajrasana yoga

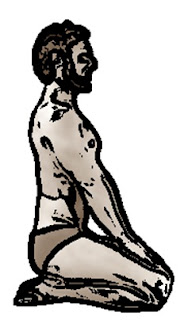
Vajrasana According to Yoga, the lower part of the body is strong as the thigh in practice, hence the name of this place is Vajrayana. Vajrasana Method: Put the spine straight in the knees and kneel down. Put your cheats on the top of the two buttons. The onus is on the ankles. The breathing will be normal. Sit in that position as easily as possible. The first two will have a little difficulty but it will be okay later. If you can not take a long time, take the seat 2/3 times. Then take the rest of the time you need to relax. Advantages: After a full meal, after keeping this seat for some time, the food is easily digested and digestion increases. According to many, the hair in the throats is not easy to hair or to fall. In this seated practice, the muscles and nerves of the feet are fresh and active. Moreover, the lower part of the sub-section should be made of lower or immovable seats. To make the lower body fit, this seat is unrivaled.

Westinganan yoga

Westerners (b) পশ্চিমোত্থানাসন Method: Sit straight and spread legs in front of the Western like (a). Exception only, lower the upper part of the body from the waist and keep the body on the knees where the spine will wither through the head. Now you have to keep the two-legged ankle with the hand and hold the two-finger thumb with the other hand. Do not break the knee fold, the legs will hang on the floor and the breathing will be normal. Stay in that condition from 20 to 30s. Then lengthen your hands and sit down slowly. Thus, turn the seat from 4 to 6 times by turning the body to the right and left. Advantages: Similar to Westerns (A). There is also a very good exercise of the muscles and nerves of the neck, throat, shoulders, chest, waist, back, spine and spine, as the body is twisted in the upper part. Prohibitions and Warnings: Similar to Westerns (A).  Split-Westerns (Bibhakta-Paschimottanasana)  Split-Westerns Method: Stand up straight. Put your hand

Paschimottanasana

Paschimatanasana : The seat is called WestcottaSana (Paschimottanasana) due to excessive exercise on the back of the body. And there are several methods of practice in different ways. . WestestationCondition (a) Paschimottanasana Method: Sit straight and spread the legs in front. Take the right foot with the right hand and the left foot of the left foot with the left hand leaving the body lower than the waist. Now get more bent with stomach urine and forehead knees. Place two elbows on the floor on both sides of the foot and in that condition stay between the 20s and 30s. The breathing will be normal. Then take your breath off and sit down slowly. So make the seat 3/4 times. Take the rest of your life, if necessary. After doing this practice, first, make the seat first and get your head lying on top of the head and spread it. Take the legs straight from the waist to the ankle and lift the upper part of the body from the waist, slowly lift it from the ground and hold

Purna-Ushtrasana yoga

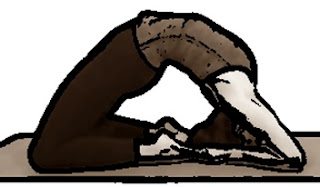
Purna-Ushtrasana Method: First, sit in the stomach of Urtasan. Hold the hands from the ankle to the feet of the feet. Place the elbows broken into the ground and lower the head and place it in the middle of your hands. Keep the bronchus on the feet of the head. The breathing will be normal and stay in the range of 20s to 30s. Then slowly on the palm of the hand and slowly sit on the knees and rest. Make the seat 2/3 times and relax if necessary. Purna-Ushtrasana Advantages: All the qualities of Urtasan are present in this seat and there are better and faster results. At the time of the practice, there is a lot of pressure in the middle of the body because it is a very good exercise in a short time. Especially the cage of the chest can not have faults and cramps. With this seat, if there is habitat or rabbit habit, rheumatism, sciatica, slipped disc, lumbar spondylosis can never be a national disease. Prohibition: Urtasan is similar. Until the disease is healin

Ushtrasana yoga

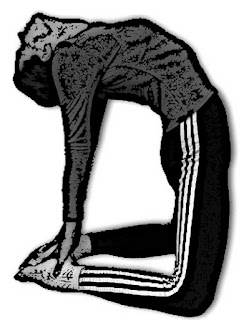
Vistrasson | ... This seat is called Ushtrasana because the middle part of the body looks like a lot of camels in the seat. Method: Break the knee and put the feet on the knees and keep the spine straight. From the feet of the feet to the knee, the lower part of the foot will cling to the ground. Now hold two hands with two hands on the ankle or ankle. Now the chest and abdomen will be as hard as possible to bend at the top and back of the head. The breathing will be normal. Stay in the condition of 20 to 30s. Then stand on the knees slowly and slowly restrain your hands and body. In this way, do the seat 2/3 times and take rest as you need. Ushtrasana Advantages: The seat is necessary for those who are curved in front of the spine and those who are tired or unsteady in their age. This seat is particularly flexible and strong in the spinal cord. The muscles of the chest and rib bones increase the bone. Spinal nerves and spinal cord muscles are fresh and active. In

Uttanasana. Yoga,

Pada-hastasana: Because the hand is also placed with the feet, this seat is called pada-hastasana. Sometimes this seat is called Uttanasana. Pada-hastasana Method: Pair two pairs and raise your hands on both heads and stand upright. Keeping the legs straight from the ankle to the waist, leave the upper part of the body, lower the upper part of the ankle, or place the arms on the front or side of the feet with the hands on the floor and prostate. Try to knit the head and put it in the chest and stomach uproot. Keep in mind, do not break the knee. The breathing will be normal. Stay in this situation from 20 to 30s. Then take your breath off and stand up slowly. Hold the seat with rest for 2/3 times. First of all, knee, chest, the stomach will not go to the right place, or the knees will be slightly twisted. But with no shock or force should not try to fix it. It may hurt the waist or spinal cord. Two days will be okay after the practice. Functionality: Keeping the

Kalakand Recipe

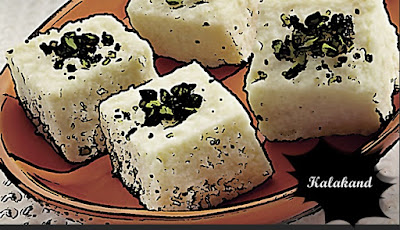
Kalakand, delectable milk-based for the most part sweet with insights of cardamon, is one more technique for getting a charge out of the integrity of milk. it's the same as Barfi and frequently ready on festivals like Diwali, Navaratri, and Holi. Kalakand is often ready reception in 2 totally different methods; 1) within the ancient way by preparation the milk on low heat till reduced to semi-solids, and 2) in an immediate method by exploitation Paneer and sweet milk. The tradition preparation approach needs a longer preparation time compared with the moment technique. However, whether or not it's roasted in a very ancient method or in an immediate method, its final style and texture square measure similar. This Kalakand instruction follows an immediate approach, needs solely 3 ingredients, sweet milk, paneer, and cardamom, and explains the whole method with step by step photos. Ingredients: Kalakand Recipe 1½ cups tightly packed grated Paneer (approx. 200 gr

Spice Glaze

The ingredients 1 preserved ham fully poached with bone and nine to one0 pounds (half or a part of the shank) 2 tablespoons of whole cloves (optional) 1 one/2 cups of icing, follow the recipes Addresses Remove the ham from the white goods and permit it to succeed in temperature, more or less half-hour. Spice Glaze Preheat the kitchen appliance to 325 degrees F. take away the skin from the ham. Use a pointy knife to mark through the grease during a diagonal shading pattern while not cutting the meat. Insert the teeth into the ham (if you utilize it), putting them at the intersections of the cuts. Place the ham, flat down, on a rack during a baking dish. Pour 1/4 in. of water into rock bottom of the pan. Transfer to the kitchen appliance and broil till a measuring system inserted within the thickest a part of the ham registers one hundred thirty degrees F, more or less a pair of hours, half-hour (approximately q

Receta clásica de jamón glaseado

Los ingredientes 1 jamón ahumado totalmente cocido con hueso y de 9 a 10 libras (mitad o parte del vástago) 2 cucharadas de clavos enteros (opcional) 1 1/2 tazas de glaseado, siguen las recetas Direcciones Retire el jamón del refrigerador y deje que alcance la temperatura ambiente, aproximadamente 30 minutos. Precaliente el horno a 325 grados F. Quite la piel del jamón. Use un cuchillo afilado para marcar a través de la grasa en un patrón de sombreado diagonal sin cortar la carne. Inserte los dientes en el jamón (si lo usa), colocándolos en las intersecciones de los cortes. Coloque el jamón, plano hacia abajo, en una rejilla en una fuente para hornear. Vierta 1/4 pulgada de agua en el fondo de la sartén. Transfiera al horno y ase hasta que un termómetro insertado en la parte más gruesa del jamón registre 130 grados F, aproximadamente 2 horas, 30 minutos (aproximadamente 15 minutos por libra). Aumente la temperatura del horno a 425 grados F. Vierta la mitad